6 Halloween Activities for the Music Room
[et_pb_section bb_built=”1″][et_pb_row][et_pb_column type=”4_4″][et_pb_text _builder_version=”3.17.2″]
I looooove holidays, especially in the elementary music classroom. There’s something magical about celebrations with those sweet kiddos, and I always do my best to add in some seasonal flair where I can. Here are six of my favorite Halloween activities that don’t require you to stop teaching everything to do. Oh no, there’s some juicy music learning in each and every one of these!!
(1) Passing Games:
Passing games are always such a favorite of mine, especially around the holidays! I love using a seasonal or holiday object to make things a little festive! I learned “We Will Pass the Pumpkin” from another teacher colleague of mine when I first started teaching. Beyond that, I don’t have a source (if you know one, please let me know!), because she said she’s been singing it for years and years and years.
This game is super simple, and is a favorite of all of my students, whether they are kindergarteners or fifth graders!! It’s simple enough–you simply take a pumpkin (I find a really small gourd version, or an artificial one from the craft store) and pass it around a seated circle to the steady beat. At the very end it speeds up, and whomever has it “when the music stops” is out! Take a listen below–the instructions are right in the song. (And remember: I’m a trumpet player by trade 😉 )
Important Note: the words also say “anyone is out if the pumpkin drops.” We always have a very serious talk about who is the referee (ME) during this game. I always have the rule that if you don’t pass the pumpkin, hand to hand, then you are out. If I see “air-time” (even a light toss or throw), that student is out. We always do a practice round before the game starts so that the rules are super clear.
I have another fun passing game song in the Resource Library for all my Anacrusic Insiders!! IT’s called Jack-o-lantern! Click on over to check it out. 🙂
(2) Halloween Books
It’s no secret that I absolutely love using books in the music classroom. I find that singing a story and finding books with a wonderful rhyme scheme or vocal exploration application really helps engage my students, along with encouraging participation with their singing voices! It’s also a great way to incorporate seasonal themes, if some of your song repertoire doesn’t necessarily lend itself to that.
(Full Disclosure: The links below are Amazon Affiliate links. Also, I talked about these four books in my Instagram live last week!! Did you catch it?! Follow me here so you don’t miss the next one!!)
(I have to give credit for finding this ah-mazing book to one of my students at the American Kodály Institute!! Rachael, you are a rock star!!) If you do anything with the song “Over in the Meadow” in your classroom, this is an awesome book to pair with that! I could do a whole separate blog post on what the original song is good for (audiating tonic, rhyming words, phrasing, etc.) but just trust me that this is one of many variations that are in book form that you should add to your music book library! For bonus points, I sing it in minor.
This is my Halloween vocal exploration jam. I print out ghost icons on cardstock and laminate them so every student has a manipulative to play with during vocal exploration. You could also make tissue ghosts—just wrap a tissue over cotton balls and add two sharpie dots for eyes. There’s no set “cue” for when to do different vocal explorations, but I just scatter it throughout this book. You can lead or have a student lead! Take advantage of the different ways ghosts make sounds to practice different vowel sounds and placements.
The Little Old Lady Who Was Not Afraid of Anything:
This is a gem. There are repeated sounds that reoccur throughout the story, such as “clomp clomp.” Have your students pick unpitched percussion instruments to represent the sounds and help tell the story. (I personally think keeping “clomp clomp” with shoes is awesome—just make sure they can tie them up quick if there’s a fire drill!! #beenthere #playedthatgame)
There Was An Old Lady Who Swallowed A Bat:
We all know the original song tale about the Old lady who swallowed a fly, right? There are about a million different variations out there. Do yourself a favor and get your hands on all these books. The kids love them, and you can have them audiate and sing cadences all the livelong day. #rhymingwords
(3) Five Little Pumpkins
This rhyme is an old standby, because it’s good for SOOO many things!! (If you don’t know it, just google it and you’ll about a million different YouTube videos for it!) I don’t use it as a song, but rather as a chant.
It’s perfect for practicing four voices (speaking, singing, shouting, whispering), either with the whole rhyme one way or different lines as the different voices. It’s also easy to add unpitched percussion to tell the story. My absolute favorite thing to do is to have students act it out in small groups. Get creative!!
(4) Trick or Treat Games:
I love doing different Halloween speech patterns this time of year. I’ve seen lots of super fun activities with different candies, but I prefer to use costumed characters! I made these trick or treat interactive games to review all the fun rhythms for Halloween!! Get them here. 🙂
(5) Halloween Listening:
There are so many fun pieces to use around Halloween time as listening examples! My two favorites are Toccata and Fugue & In the Hall of the Mountain King. Toccata and Fugue requires a bit more ahead of time planning, due to the form of the piece. There are some excellent listening maps out there that do an excellent job of outlining this form.
In the Hall of the Mountain King is the perfect steady beat and fast/slow comparative song for the younger grades. I like to lead a follow the leader steady beat movement game that glows in the dark! Find some fun glow in the dark gloves, give students glow sticks, and dim the lights!!
(6) Jack-o-lantern Song & Games!
Now if you’re looking for something that gives a little Halloween taste with the main meal still practicing concepts on your curriculum map, this resource is for you. This group of presentations and games is everything you could need to practice so and mi in the month of October.

Have a Happy Halloween!!
[/et_pb_text][/et_pb_column][/et_pb_row][/et_pb_section]
Improve Parent Communication {Sparkle & Shine BTS Pt 5}
Y’all. Can you even believe it? It’s still September and we’re finally wrapping up this back to school series!! (…hey, one day still counts!) I hope that this series has been helpful for you and you’ve picked up a couple tips and tricks along the way. This last topic is one that has definitely been tricky for me in the past, so I hope these tricks I’ve picked up help you!
Love it our hate it, (and depending on the circumstances, it could definitely be a little bit of both!) parent communication is part of the teacher gig. And if you’re a music teacher, you likely have 500 or more students, and therefore approximately 2,395,827 parents to communicate with.
And if you’re liiittle passive aggressive like me, it’s a total party. #not
Aside from the occasional parent contact for a problem or, hopefully more often, a total rock star day, most of my parent communication is to the masses. Here are 4 ways I keep those channels open and positive throughout the year. (Psst! If you want more info on how I do those parent contacts for the tricky kiddos, click here to check out this post.)
**Note: I understand that many students do not necessarily go home to their parents, but may be in a different home situation where they see grandparents, an older brother or sister, an aunt or uncle, or even a family friend when they head home from school. For the ease of reading (and writing!) this post, the term “ parents” really means whomever is loving on your sweet kiddos outside of the school day. 🙂
#1 – Take Home Trinkets
Although this isn’t necessarily direct communication, the number one way to get parents curious as to what you’re doing in the music room is to send your kiddos home with a little something special. Nothing huge that you have to stop everything to make and send home, but when the opportunity presents itself having something here or there to put in the good ol’ take home folder is a nice touch.
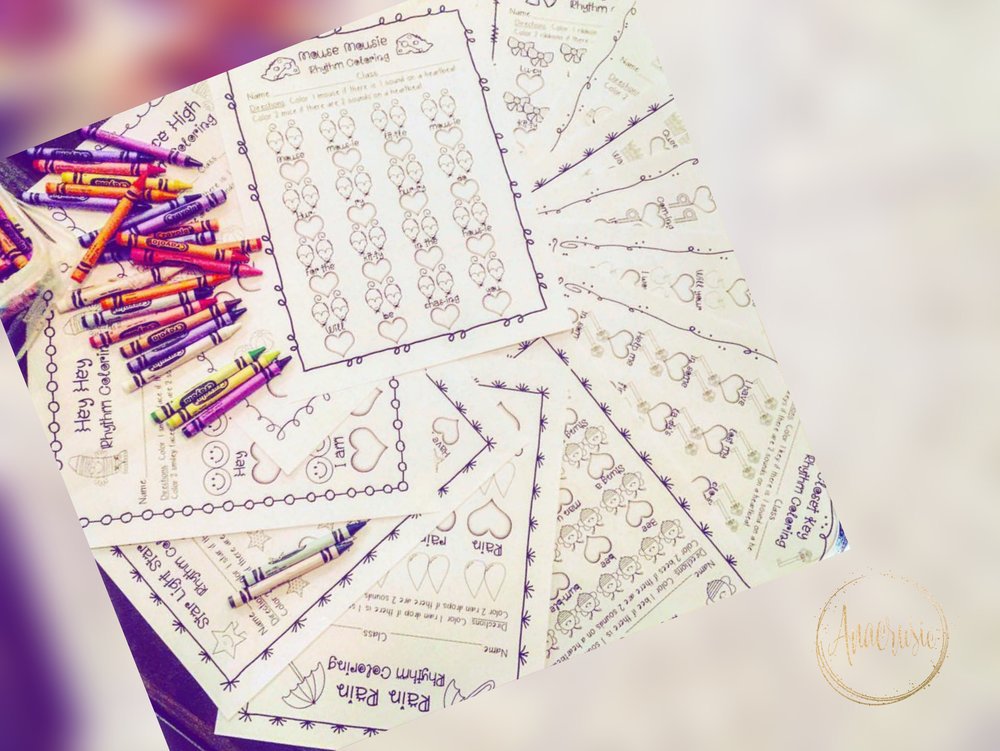
My kindergarten students absolutely love these rhythm coloring sheets, and I get the best positive feedback from parents when they get to take them home. I think it’s a refreshing surprise for parents to see something tangible come from the music room. Although worksheets are not my most favorite form of music making (…not as active as it could or should be!), seeing a piece of paper with musical concepts that kids can explain reinforces that learning happens in the music room!
#2 – A Note from the Music Room
At my old campus, all of the specialists (Music, Art, P.E., & Library) took turns sharing what was happening in each of our respective classrooms. It was a brief, but effective way to give parents a little bit of information without completely bombarding them with #everylittlething that is happening in the day in and day out of the music room. It was just enough to feel connected.
This is probably the easiest way to start a direct communication line with parents. Not too much of a commitment, not solely on your shoulders, and creates a nice collaboration with your team! I highly recommend starting here if you’re new to reaching out to parents on a consistent basis.
#3 – A Music Newsletter
Taking it up a notch, I know several folks who create a newsletter that is specific to their music room. This can be incredibly effective and tailor made to each class or grade level, or better yet, if you have a choir or other special performing group. Most folks send something like this out about once a month, and highlight some of the learning objects that students are discovering, and gives hints for opening up communication about music class at home.
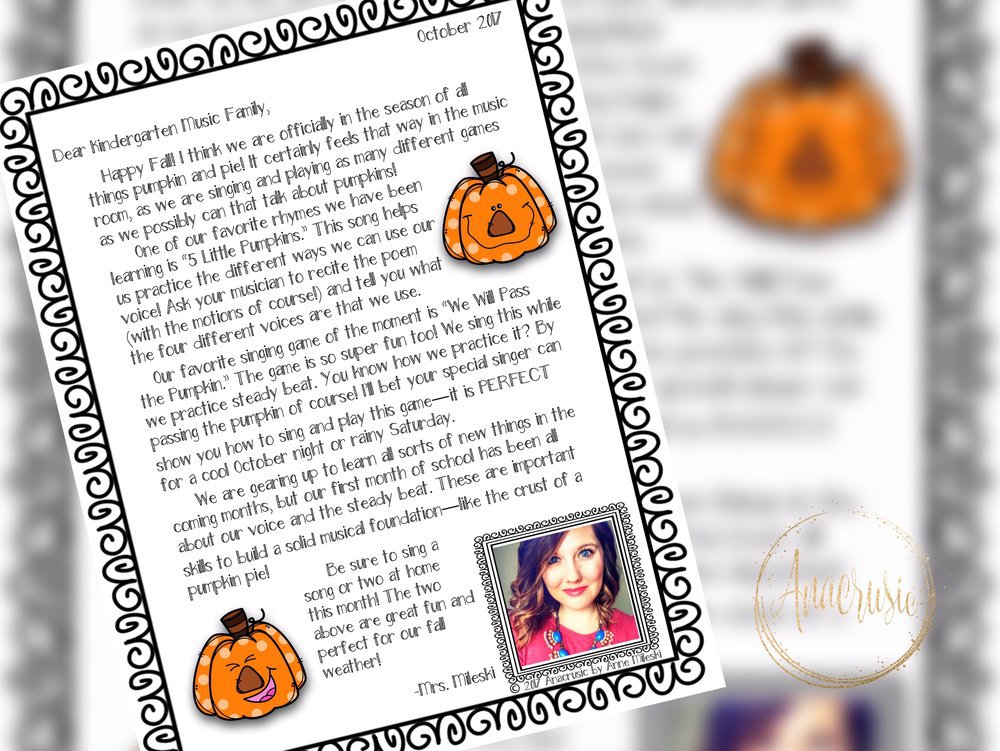
For a choir or other performance group that might have more frequent and time sensitive announcements, a weekly newsletter might be the way to go. Remember that no matter how often you are sending this out, you can do it digitally, or pass out a hard copy… or both. Because let’s be real, the more modes of communication, the better!
#4 – Seesaw – The Secret Sauce
This past year, I completely fell in love with Seesaw. I didn’t set it up for all of my classes, but I did a “pilot” version with one of the Kindergarten teachers at my building and it was amazing. If you aren’t familiar with Seesaw, it’s an app that serves as a classroom Facebook of sorts, where students and teachers can post videos, photos, and other things to the class page or to personal pages. Parents can log in and “like” and comment on things their child is doing throughout the day!
What made this really successful for me was being set up as a “co-teacher” in the classroom. What that means is the teacher I was collaborating with gave me access to her classroom (on my own account) and made a music folder for each student and the class. Throughout the year I posted individual videos of students solo singing (while I was assessing), and whole class videos of performances and super fun games we were playing. The kids loved it, and the parents really enjoyed having a look into the music classroom—something they don’t get to do very often!
I’m hoping to dive even deeper into Seesaw this year, and hope to have some tips and tricks coming at you soon! Overall, I think this is probably the most effective way to communicate with parents on a regular basis. They can download the app on their phones and enable notifications (if they’d like) so they are always up to date! If their students have music once or twice a week and they see posts on Seesaw on a semi-regular basis, say twice a month, what a special way for them to feel connected!
And there you have it! We’ve finally come to the end of the Sparkle & Shine Back to School Series!! (It only took me two months…) I hope that you’ve found these posts useful and that there are a few tips or tricks that are either new to you or made you think a little differently. The goal for all of us is to always be learning and making our teaching practice a little bit better for our kids! Here’s a recap of all the posts in case you missed anything:
- Part I – FOOLPROOF classroom rules & procedures
- Part II – create the perfect OPENING routine to get your kids in gear
- Part III – set up your music classroom to optimize ACTIVE music making
- Part IV – plan for the WHOLE year at a glance
- Part V – IMPROVE parent communication (scroll on up if you somehow missed it!!)
All the freebies from this series (and more!) are in the Resource Library, so make sure you’re all signed up to be an Anacrusic Insider so you have total access!
Plan for the Whole Year at a Glance {Sparkle & Shine BTS Pt 4}
Welcome, finally, to Part IV of the Sparkle & Shine BTS Series!!
Oh my goodness, isn’t this a long time coming!! WHEW! (…especially for y’all who have been in school since July. Holy guac & margs!! <—that’s how the saying goes, right??)
This post is all about how I do my overarching plan for the year. You aren’t going to get a lot of finite details in this post, but you will get a lot of big picture snapshots that give a little insight on how to get your learning goals on target. Stay tuned to the very end for a giveaway you won’t want to miss!!
Without further ado, here is how I set up my brain space to make some magic happen in the elementary music room throughout the year. (psst!! Even if you’ve been in school since July, it’s not too late to think or even re-align your goals, so keep on reading!!)
Step 1: Begin with the end in mind
“Let’s start at the very beginning… a very good place to start…” Nope, not when you’re talking about long-term planning. Sorry ‘bout your bad luck, Maria. #wahwah
The most effective thing you can do when thinking about what your learning objectives will be is to think about what you want your students leaving your classroom being able to do or talk about. Notice, both of those things are observable actions you can (*ahem* buzzword) assess. That is, you can say “oh my kids are going to learn quarter note.” That’s great, but what does that mean? What can they do with it? Can they explain it? Can they read it, write it, move it, improvise with it, and compose with it?
Are you following my breadcrumbs so far?
If you’re a rookie in the long-term objective game, start with one grade level. Kindergarten is a good place to start, because it is often the very beginning (… and Maria makes a comeback.) What do you want your students to be able to do when they leave Kindergarten? Keep a steady beat? Identify one or two sounds on a beat? Show high and low? Once you identify the goals for one grade level, you can then see how those skills will transfer later on. Say… to first grade.
See how that works? If you’re brain works better going from Fifth or Sixth grade backwards, then do it that way. But if you’re like me, I’m much more successful going simple—>complex. (I bet your kids will be too).
Step 2: Identify & Sequence Concepts
Once you’ve hammered out #allthethings you want a grade level to accomplish by the time spring/summer rolls around (or your third bout of winter, depending on where you live), turn those actionable goals into units by organizing concepts. For example, if you want your kids to be able to identify one and two sounds on a beat by the end of the year, they better have lots and lots of practice with: steady beat, long & short sounds, practicing the way the words go, identifying beat versus rhythm, and some comparative work to (think faster/slower, etc).
Here’s what you do. Think about that big picture concept and say well what would they need to do right before they could do this goal. Then inch it back to right before that, and right before that, and right before that. Now you’ve made your sequence.
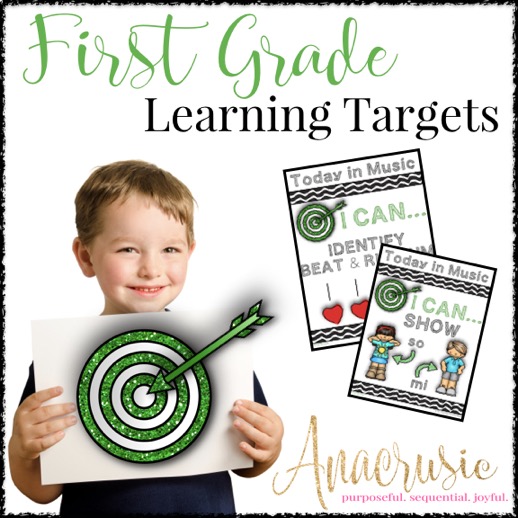
(If this hurts your brain a whole lot, there’s a lot of resources out there that help sequence things for you. I love Rita Klinger’s Lesson Planning in a Kodály Setting <—click to get it here. My learning targets also give you a good idea of an effective sequence <—click to get my Kindergarten set here. (…or enter the giveaway below!)
Step 3: Break it Down by Month
Once you have all of your concepts identified and ordered, set up a plan for the year. Now this is a flexible roadmap that will inevitably change. Because: field trips, assemblies, and all kinds of other things that you have no control over. The idea is to make some loose goals to keep yourself on track and drive you teaching purposefully.
(…well that was short and sweet. How un-Anne like 😉 )
Step 4: Choose Activities & Rep
This is my most favorite part!! After you have identified your sequence and set some timing goals, start pulling from your treasure trove of resources and identifying repertoire and activities by concept. If you’ve never done this before and are feeling super overwhelmed, check out the Holy Names Folk Song Collection <—click it, you know you want to! This is a free and accessible example of how to organize materials by grade level and/or element.
Lots of other resources organize things similarly. Some of my favorites are Sail Away, 150 American Folk Songs, and An American Methodology. Once you start looking through these resources and the accompanying index within each one, you’ll get an idea of why a song is good for one concept as opposed to another. Then you can start to apply that critical eye to any resource you pick up!
Step 5: Get Creative!!
Once you’ve figured out your overall sequence and an concept timeline, and have found repertoire that fits your sequence, it’s time to start supplementing some of your own! Use resources that you browse and buy as inspiration points to come up with your own ideas and lessons. And if something doesn’t work the first time, try try TRY again!
Of course, there are so many awesome resources out there already pre-made for you, and when you are in the classroom it is so helpful to know there are some go-to spots that you can trust are beautifully sequenced and purposeful. But you have the power and creativity to make some special lessons made to order for your students alone. None of our classrooms are one size fits all, and you know your kids the best! 😃
Now for the fun part–a GIVEAWAY!! Enter below for a chance to win a couple sets of Learning Targets, just for you!
Good Luck!! 🙂
When it comes to this Sparkle & Shine BTS Series, you don’t wanna miss a thing!! (Oh Aerosmith…) Don’t forget, there are going to be some freebies and goodies along the way as well!! Here’s a peek at all the good stuff coming up:
- Part I – FOOLPROOF classroom rules & procedures
- Part II – create the perfect OPENING routine to get your kids in gear
- Part III – set up your music classroom to optimize ACTIVE music making
- Part IV – plan for the WHOLE year at a glance (scroll on up if you somehow missed it!!)
- Part V – IMPROVE parent communication <—coming soon, for reals!!
If you want to make sure you’re ahead of the game on getting any of those freebies, make sure you’re signed up to be an Anacrusic Insider!! You can do it above AND enter the giveaway all at the same time. #yourewelcome 🙂
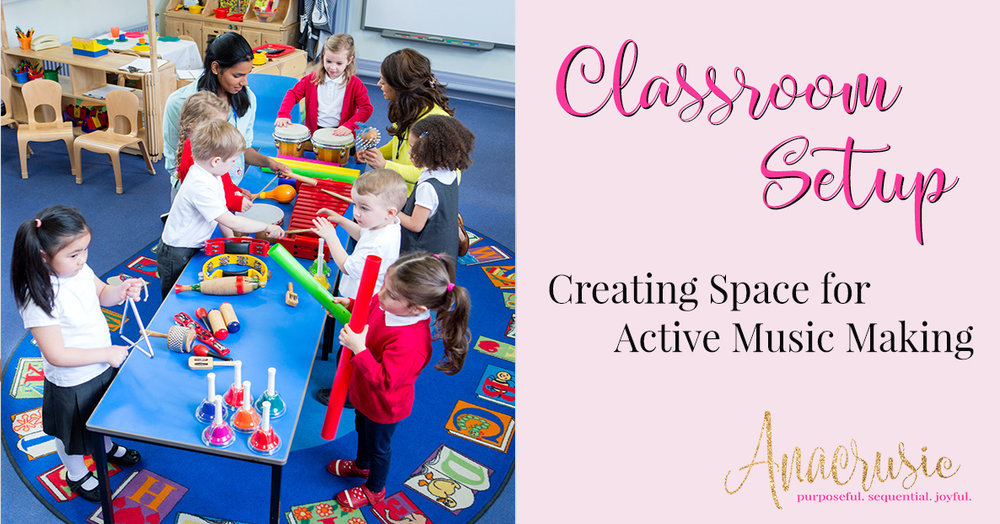
Classroom Setup: Creating Space for Active Music Making {Sparkle & Shine BTS Pt 3}
Welcome to Part III of the Sparkle & Shine BTS Series!!
This post is all about setting up your classroom in zones to make transitions and instructional time super duper efficient. You’ve probably already gotten into the swing of things, and most certainly have your classroom set up (with kids making music in it already I’ll bet), but this post might just have a few ideas you can adapt to your classroom to run things just a teeensy bit smoother.
My classroom this year is a music teacher’s dream. In a brand new building, I was fortunate enough to have a lot of input on what kinds of instruments and resources we would have for our students. Even though I’m on maternity leave for the first part of this school year, I was so excited to have everything set up and ready to go for my sub and the rest of the year.
Then BAM—baby girl came early.
No one’s complaining here, because we have a beautiful, healthy little girl who has turned our world upside down in the most wonderful of ways. But I definitely did get my first harsh reality in the wonderful world of rookie parenting: expect the unexpected/be ready for change/be flexible with plans, etc.
All things I’m really really awesome at. (#notreally #teachermomlife #fakeittilyoumakeit)
Before baby, I did check out my new space, took a few million pictures, and made plans for how I want to use the space. All of this comes down to how I create zones in my classroom to make transitioning activities easy breezy lemon squeezy. So although you’ve probably already set up your classroom for the year, and taught more than a handful of kiddos by now, hopefully some of these tips, tricks, and ideas can be implemented into your music room.
(psst!! If you want to see the pictures of my space as a completely blank slate, check out this instagram post here!!)
Zone 1 – Home Base
This is the place where my students know to go the moment they come in the music room. I generally don’t have an activity or song for students as they enter the room, but we do get things cracking the moment they come in with an opening sequence (you can read more about that here).
For me, being at a Kindergarten-2nd Grade School, I find that sit spots are magical. I put the students in a grid formation, with color coded rows. Each student has an assigned spot and are seated boy/girl every other spot. The kids LOVE this as their whole world is all about patterns. (#kindergarten) But for older kids, I have used risers, but still have assigned spots in the same pattern
I do this the old school way with just a pencil and paper. I make sure I use pencil as there are often times I need to make an adjustment within the first couple of weeks (prior to any assessing, usually) as I get to know the kids better, as well as who they can or can’t sit next to. I usually switch up spots after each grading period, since my seating chart also serves as my assessment record. (Get your free copy of my seating chart & find out more about how I do assessment here.)
Zone 2 – Movement Zone
This is probably the easiest zone to create, because it is literally a wide open space. There absolutely positively has to be room for your kids to PLAY and make music in your classroom. This completely and totally overlaps with my Home Base, because we literally play on top of sit spots. Either we ignore them and make a circle (although I know teachers who have different colors of spots for different formations), or we use the sit spot grid to create a long-ways set, or we move in free space for a different type of activity. No matter you movement cup of tea, it’s important to have an open and safe space for kids to move and purposefully play.
Zone 3 – Instrument Zone
The Instrument Zone is one that may be permanent, or temporary depending on the space you have available in your classroom. I’m talking mostly about barred instruments, but also rhythm instruments if you don’t have them readily accessible to your students. I strongly, strongly recommend that you keep your instruments out as often as possible. I find that if I have my instruments put away and only get them out on certain days, I use them far and away less frequently then if they are set up all the time in the back of my classroom.
There’s so many times a lesson or game is progressing more efficiently than what I expect and it’s a natural extension to have kids add a simple instrument part or do a quick improvisation. If everything is put up and away, it likely takes up so much time to set up that you’ll be less likely to take that extra 5-10 minutes and do something really meaningful with the time.
I generally have my instruments set up in the back of the room, and my kids know the procedures for going to the instruments. I think it’s also really effective to have a system in place for students to choose instruments, to minimize arguing etc. The way I like to do that is with cards that I deal out to students letting them know what instrument is theirs for the day. The cards correspond to the different barred instruments and eliminate any arguments about who gets to play “the big one” (i.e. the bass xylophone) for the day.
Zone 4 – Stations Zone
Stations are about 4-5 different areas in the room that I have either numbered or lettered or otherwise marked for days that we might do stations. Generally when I do station activities in the classroom they are practice or extension activities for concepts we have already learned, with one of the stations being an assessment station with me. These areas may or may not include some sort of technology (i.e. iPads or other tablets), but generally are in four corners spread out across the room.
Zone 5 – High Concentration Zone/Board Work
Most all of my lessons have a portion I consider to be the meatiest, or highest concentration, where students are led to discover a new musical concept, at least in terms of music literacy. This almost always takes place (after a ton of exploration) at the board. I don’t do a lot of defining this space, except that my students know to (1) get close enough to the board where they can see and focus, (2) leave room for me to walk in front of the board, and (3) make a good choice about who they sit next to.
Zone 6 – Calm Zone/Reading Nook
This is an essential zone for little ones especially. The reading nook has a rug and a rocking chair, and is almost always where I keep my puppets. This is the spot I go to when I want to sing a story to students, do some listening activities (if they don’t incorporate locomotor movement) and is a perfect spot to close out Kindergarten.
Zone 7 – End Zone
The end zone is where class comes to a natural close. For younger classes, this can also be the same as the calm zone or reading nook. For older grades, I often end class where we started–in their assigned seats. Another great idea would be to have a special line up spot where students know they are to reset for transitioning back to the grade level classroom. Regardless, this is where I review learning targets for the day and have students self-assess their understanding of whatever observable skills we may have been working on.
Zone 8 – Teacher Zone
Last, but certainly not least, is the teacher zone. It is so important for you to have a place, er corner, that is your very own. Whether it is a music stand to have all your resources organized, an apron to keep manipulatives handy, or your desk that is close by, it’s important to have a home base for yourself as a teacher. If you are lucky enough to have an office away from your teaching space, I really recommend that you create another, obviously smaller, kid free zone in the classroom that has all of your plans, tech, tuning fork, and other things you may need at the ready.
I hope that these different zones have given you a new way to approach the set up of your classroom. Even if there isn’t much room for a distinction between different physical spaces in your music room, having different procedures in place to get in the zone will make all the difference in your transitions and overall teaching.
When it comes to this Sparkle & Shine BTS Series, you don’t wanna miss a thing!! (Oh Aerosmith…) Don’t forget, there are going to be some freebies and goodies along the way as well!! Here’s a peek at all the good stuff coming up:
- Part I – FOOLPROOF classroom rules & procedures
- Part II – create the perfect OPENING routine to get your kids in gear
- Part III – set up your music classroom to optimize ACTIVE music making (…scroll on up if somehow you missed it!)
- Part IV – plan for the WHOLE year at a glance
- Part V – IMPROVE parent communication
If you want to make sure you’re ahead of the game on getting any of those freebies, make sure you’re signed up to be an Anacrusic Insider below!!
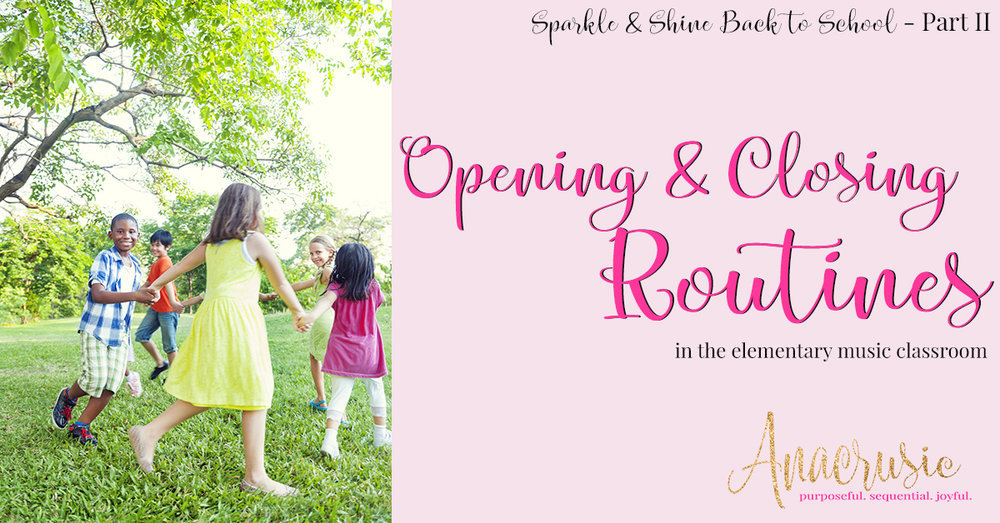
Opening & Closing Routines in the Elementary Music Classroom {Sparkle & Shine BTS PT 2}
Hey party people! I’m so glad you came back for more Back to School goodness to get you set with your best foot forward for the year.
Last time we chatted about creating rules and procedures to get your year off and cooking. Today is all about taking things a step further and creating beautiful opening and closing routines in the music classroom. Let’s jump right to it!!
One of the most effective things that gets kids in gear and ready to go in the music room is to establish routines. I already talked all about procedures and rules, but the type of routine I’m going to talk about now has everything to do with setting the stage for active music making. Although the structure of my music lessons may look different depending on the concepts we are covering, the beginning and ending of my lessons almost always follow the same pattern.
An opening routine for Kindergarten, First, & Second Grade
I tend to separate grade levels into lower (K-1-2) and upper (3-4-5) elementary when doing overarching planning such as creating an opening sequence. For my younger musicians, I tend to keep things pretty much the same lesson to lesson, as establishing that routine really puts them in the correct frame of mind and develops focus essential for later components of the lesson. Often, my opening sequence for K-1-2 will include some or all of the following elements:
Stretches – When walking into the room, my students have practiced going quickly and quietly to their assigned seat, because the moment everyone is in the room, we start with stretches. With my youngest students, this is usually as simple as putting their hands in the air and bending over to touch their toes. I have sung instructions, which they echo back, and transition directly into the next section. Take a listen below to get an idea of how it goes: (psst!! remember this lady is a brand new sleep deprived mama!! My voice is not in tip top shape!! …not that I’m making excuses ;))
Hello Songs – I always have a few different greeting songs that I sing with my students. There are about a million out there to choose from, and a few of my favorites come straight out of the music textbook series adopted by my building. The point of this portion of the opening sequence is simply to get kids singing. Bonus if you can incorporate different movements and movement exploration within the lyrics of the song.
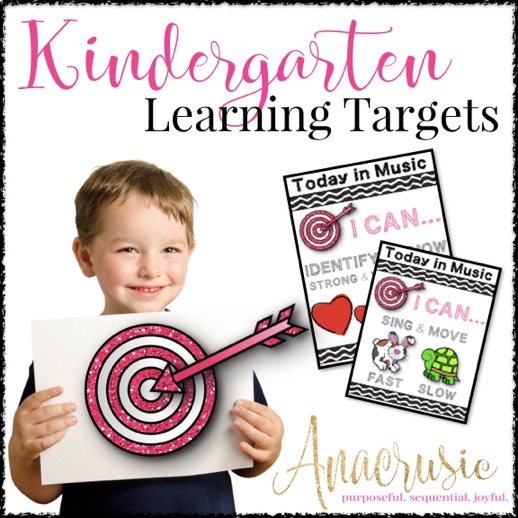
Learning Targets – Since the students have been engaged by both moving and singing at this point, I take a split second (like seriously, not more than a minute) to point out our learning target for the day. I have students repeat the target after me in segments, such as: “Today in Music” (repeat) “I can” (repeat) “use my voice in different ways” (repeat). My learning targets have some nifty visuals that aid in student understanding and recognition of our targets for the day. If you’re looking for some learning targets, check out my Kindergarten set here & my First Grade set here.
Vocal Exploration – After singing a few hello songs “cold”, I move into really getting students’ voices ready to go. This always includes some sort of vocal exploration story or game. I’ve found that getting kiddos into the proper voice placement is almost always more successful with the use of props, stories, or some sort of visual aid or manipulative that can be used. I use these FREE Hot Air Balloon Vocal Explorations with the story Away We Go (<-affiliate link) and laminated hot air balloons to get kids voices going up into the air.
Echo Singing & Rhythmic Reading – I love to get all of my students, but especially my younger students echo singing right away in a lesson. I go back and forth between the whole class and individual students to see where everyone is sitting in terms of pitch matching and head voice. If you need some more ideas on solo singing, check out this podcast I recorded about a million years ago (seriously). For rhythmic reading, the exercises I use with my students has everything to do with where they are in my curriculum sequence. If they are in the exploration stages of a rhythmic concept, I may have them read icons, text, or even echo nonsense syllables back and forth with me without any visual cue. If they are in the practice phase, or extending material, I use challenge patterns or rhythm poison games to practice.
After setting the stage through all this rich exploration and practice, my students are ready to dive into the meat of a lesson. Although it seems like the previous lesson segments were pretty meaty in and of themselves, the bulk of my lesson is dedicated to purposefully playing and creating, where students have the opportunity to actively make music. The majority of our class time is spend in this exploration phase, with a few interjections here and there from myself to facilitate and element of musical discovery.
*Note: this entire sequence, with the exception of the lesson material, should only take about 10 minutes. Short learning episodes and smooth transitions are the keys to keep pacing up and student interest heightened. Although it seems like a lot to fit in to the first 10 minutes of a lesson (especially if you only see your kids for 30 min like me), you’ll find that keeping it brief, but consistent from lesson to lesson pays out over time.
Adapting for older students
So what does this look like with the older kids? Believe it or not, not too different. The small tweaks I make are to find opportunities for those older students to be leaders, rather than consistently using teacher led instruction. Here’s what I mean:
Stretches – have a student lead silent stretches, by coming to the front of the room and taking different formations for the class to copy. If they need a visual prompt, kids yoga cards are your friend.
Hello Songs – There are so many wonderful mixers out there (i.e. Gilly Gilly Good Morning, anyone?) that older kids love. These get them singing, moving, and interacting with one another. This last part is key as it can sometimes be difficult to get the older kids to really play.
Learning Targets – Why not make this a student job? Have a student leader read the target aloud or have students think pair share on the target for the day.
Vocal Exploration – Again, student leaders are awesome for this. Have them draw or move a vocal pathway and have the rest of the students echo.
Echo Singing & Rhythmic Reading – I love challenging older students in this portion of an opening sequence. Use neutral syllables and have students decode, or challenge them with a memory game like the Clever Caterpillar Rhythm Erase.
Closing Routines – Keep it Simple
To be quite honest, I don’t have an earth shattering closing sequence for my classes. I am firmly in the camp of over-planning rather than under-planning, so often times it will be time to line up when we are still playing a game or creating a new dance. However, there are a few things I would consider when thinking about the end of your lesson.
Consider a Closing Song – Even if it’s simply ending with a new lullaby each time, some sort of closing song is a great way to wrap up a lesson and emphasize that it’s time to calm down and line up.
Keep it Positive – If you are ending with a game, end at a point when everyone can feel good leaving the classroom. Often the last activity is what sticks with kids through the rest of the day, so I make a point to always end with one last round where everyone can feel successful.
Simmer Down – The one grade level I tend to have a closing pattern with is Kindergarten, particularly at the beginning of the year. I love to sing a story to them, because it gets things calm and relaxed no matter what we have been doing in class.
Double Dip – Choose an activity or game that facilitates lining up, like Acka Backa Soda Cracker.
I hope what you’ve taken away from these last two posts is that well practiced expectations and creating awareness for your students is KEY in helping them get into gear and be successful in the classroom. I hope these ideas for creating an opening & closing routine is helpful in starting your new year off right!!
When it comes to this Sparkle & Shine BTS Series, you don’t wanna miss a thing!! (Oh Aerosmith…) Don’t forget, there are going to be some freebies and goodies along the way as well!! Here’s a peek at all the good stuff coming up:
- Part I – FOOLPROOF classroom rules & procedures (click here if you missed the post!!)
- Part II – create the perfect OPENING routine to get your kids in gear (scroll up if somehow you missed it!!)
- Part III – set up your music classroom to optimize ACTIVE music making
- Part IV – plan for the WHOLE year at a glance
- Part V – IMPROVE parent communication
If you want to make sure you’re ahead of the game on getting any of those freebies, make sure you’re signed up to be an Anacrusic Insider below!!
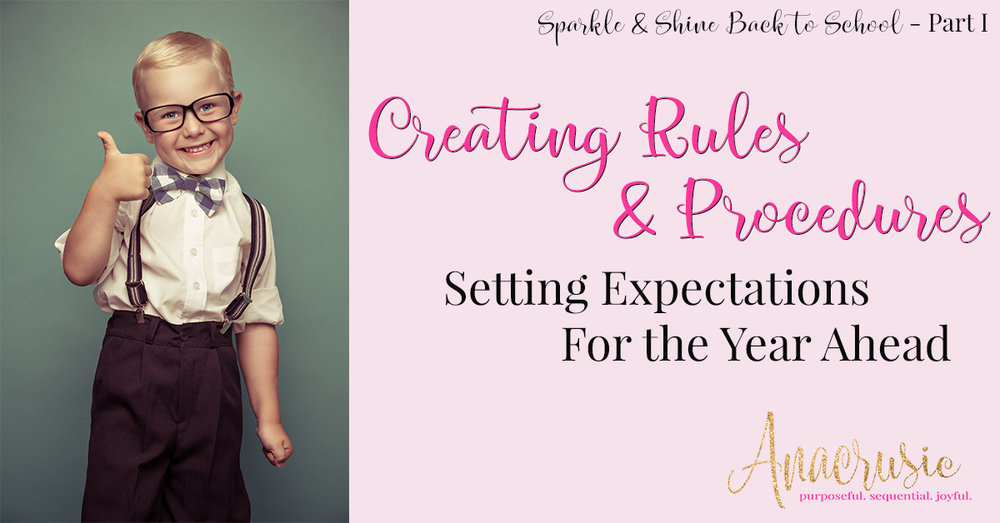
Creating Rules & Procedures {Sparkle & Shine BTS PT 1}
You’re in either one of two camps: you’re about to start the mad dash to back to school, or maybe you’ve already even started (in July? eeeeeww, I’m so sorry). OR…
You just gave me the biggest eye roll EVER at the mere mention of BTS.
I’m sorry y’all, but it’s coming. And BTS time has the biggest way of sneak attacking us, no matter how great of a job you’ve been doing at resisting the school supplies at the Target Dollar Spot. Which have been there since June. So I’ve given you some time.
#you’rewelcome.
Today marks the start of… *cue drumroll, brass band, cartwheels and glitter*
Your guide to the best start of the school year EVER. Over the next couple weeks I’m going to get you as prepared as possible for the upcoming year as possible. That way we can turn all those “I don’t knows” and “I’m not sures” into, “oh yeah, I’ve got this.”
What a fantastic segway into today’s topic, all about preparing your kids for the most successful year in your music classroom. Let’s get crackin, shall we?
First things first, let’s define some terms, shall we? Rules are the things you have in place to define and enforce your classroom expectations. Some describe it as a discipline plan, some describe it as classroom management plan, it’s all pretty much one in the same. I often find that my kids know the general rules of school life–even in Kindergarten, they tend to catch on pretty quickly. I once had a great mentor tell me:
The best classroom management plan is a good lesson plan.
It’s all about pacing, transitions, and well practiced procedures. Because, after all practice doesn’t make perfect, but it does make permanent. As in, a well practiced procedure will be embedded in your kiddos and help the pacing of your classes to be footloose and fancy free. (<— that’s a good thing!!)
Procedures
Here are a few examples of procedures I have in my music classroom:
- coming into the classroom
- lining up when it’s time to leave
- finding your seat
- moving to stations
- fire drill, lock down drill, etc.
- transitions to different zones (I’ll explain more when we talk about classroom set up!)
- transitioning to different formations (seated to circle, etc.)
- getting materials
- going to instruments
- needing a drink/bathroom/nurse
- asking a question
- finger talk (nonverbal answers as a class)
Although I always do my best to do lots of active music making from day one, there is something to be said for taking the time to practice procedures the very first day. I won’t take the time to do this whole list the first day, but I do take the time to practice entering and exiting the classroom, any safety drills, and transitioning to different formations (i.e. circle, longways set) or activity areas in the classroom (i.e. story center or stations).
Taking the time to introduce procedures the first day and practicing them briefly the next couple of classes (or anytime students don’t transition efficiently) eliminates future problems with transitions and students getting off task.
Now, it’s important to mention, none of these procedures or processes are earth shattering or complicated. For example, practicing finger talk or raising a hand to ask a question is not something that requires 10 perfectly scaffolded steps. But it is worth it to address and practice, regardless of what you expect your students to come into your classroom understanding. The music room is a very different setting than every other learning environment in the building, so it’s important to reinforce expectations that may be school wide. This leads to…
Rules
I have found that with proper procedures in place, the only concrete rules I might need in my music classroom are those that are established campus wide. Often these include ideas like safety first and respect people and materials, etc. Procedures help to ensure that these rules are put into place, but it’s worth it again to establish the expectation that the music room is another learning environment in the building that subscribes to the same rules as the rest of the school.
If you want some specific music room rules (that likely reflect some of the expectations as I outlined above) I LOVE these two sets: (1) Editable Owl Themed Music Room Rules by Music With Miss W & (2) Rainbow Brights Music Rules Posters by Pitch Publications
The Dreaded Discipline PLan
Does anyone else’s stomach drop when they hear this phrase? I feel like discipline plans are so heavily emphasized in our teacher training and also a big focus in job interviews. Classroom management is one of those things that takes a lot of time to develop, particularly in the music classroom when we don’t see the kids as frequently. But let me re-iterate what I said above…
The best classroom management plan is a good lesson plan.
If procedures are well practiced, transitions are musical and an integral part of the lesson, and your lessons are active and engaging, classroom management will become second nature to your teaching style. However, there are a few tips and tricks I’ve picked up over the years that aren’t necessarily a formal discipline plan, but aid in keeping classrooms rocking and rolling. Here are some ideas for those one or two students who seem dead set on de-railing your beautifully designed lesson.
- Name Drop – Often times if I have a student who is just not paying attention to what is going on, and taking down another student with him, I insert their name casually into the lesson that I’m teaching. Rather than stopping everything to address the behavior (which might be the exact attention he wants, and could encourage other students to follow suit), I simply say his name so he knows I see what he’s doing. It’s all about creating awareness.
- Get Close – Proximity is your friend. Just like saying a name casually creates awareness, moving a little bit closer to the problem area is generally enough to squash any shenanigans that may be taking place. This is especially effective when teaching and playing singing games and play parties. Moving around the room and anchoring yourself next to those kiddos who might need that extra awareness is so super important. Bonus points if you can use a couple of kids as the example or leaders while teaching a game. You can kill two birds with one stone this way–using proximity like no one’s business, but also giving those kids a chance to get some positive attention.
- Emphasize the J-O-B – There are times that you can’t discreetly address student behavior through proximity or name dropping. In this case, taking a quick moment to (1) get down on his level, and (2) use a whisper voice asking what his job is can create awareness. Here’s what it looks like in action: Student is participating in shenanigans. You have name dropped, gotten close and shenanigans ensue. So you crouch down and whisper, “Hey Henry, what’s your job?” the student responds, I don’t know. You say, “your job is to listen and follow directions. What is your job?” the student repeats. You say, “Awesome, you may do that.”
- Spectator Sport – The last resort is giving your student a chance to take a watching turn. Particularly if he has repeated his J-O-B and still can’t figure it out, invite him to watch because “I’m not quite sure you know what to do, so I want you take a quick second to watch.” Then invite him back swiftly so that he has the opportunity to be successful.
- Phone a Friend – Even after trying all of these steps, there are circumstances that a kiddo just gets away from you. Early on, if you sense that someone is going to have trouble in your classroom, I highly recommend enlisting the help of two key players–the classroom teacher and the parents. The odds that at least one of these folks will be in your corner is extremely likely, although it’s ideal if both are. I often ask grade level classrooms what is effective in their experience with students, since they see them more frequently and can maybe even help extend some of the classroom resources into the music room to help a student be more successful. Also, an early positive parent phone call to “touch base” when you sense a kiddo might be headed down the road of a not so positive phone call can really soften the blow when you have to talk discipline strategy. Make sure you enlist the support of others who care about your kids as much as you. It really does take a village.
A final note – Remember that kids are not usually intentionally trying to make your life miserable. Often times, they are just being curious, aren’t engaged, or aren’t well practiced in the expectations for their behavior. By creating awareness and opportunity for success as outlined above, you’re sure to notice a real difference in your students’ engagement.
Celebrate (Even the Smallest!) Successes
If you are lucky enough to be part of a PBIS school, be sure that you are participating in the school wide incentives to keep things consistent and motivating for your students. If there isn’t a system in place, touch base with grade level teachers to see if there is anything you can use in your classroom.
Creating carrots, whether they are school-wide, grade level-wide, or just in the music room, are a great way to encourage engagement and reinforce expectations. I have used all three levels of positive reinforcement, and all can be incredibly effective.
When it comes to this Sparkle & Shine BTS Series, you don’t wanna miss a thing!! (Oh Aerosmith…) Don’t forget, there are going to be some freebies and goodies along the way as well!! Here’s a peek at all the good stuff coming up:
- Part I – FOOLPROOF classroom rules & procedures (…scroll on up if somehow you missed it!)
- Part II – create the perfect OPENING routine to get your kids in gear
- Part III – set up your music classroom to optimize ACTIVE music making
- Part IV – plan for the WHOLE year at a glance
- Part V – IMPROVE parent communication
If you want to make sure you’re ahead of the game on getting any of those freebies, make sure you’re signed up to be an Anacrusic Insider below!!